
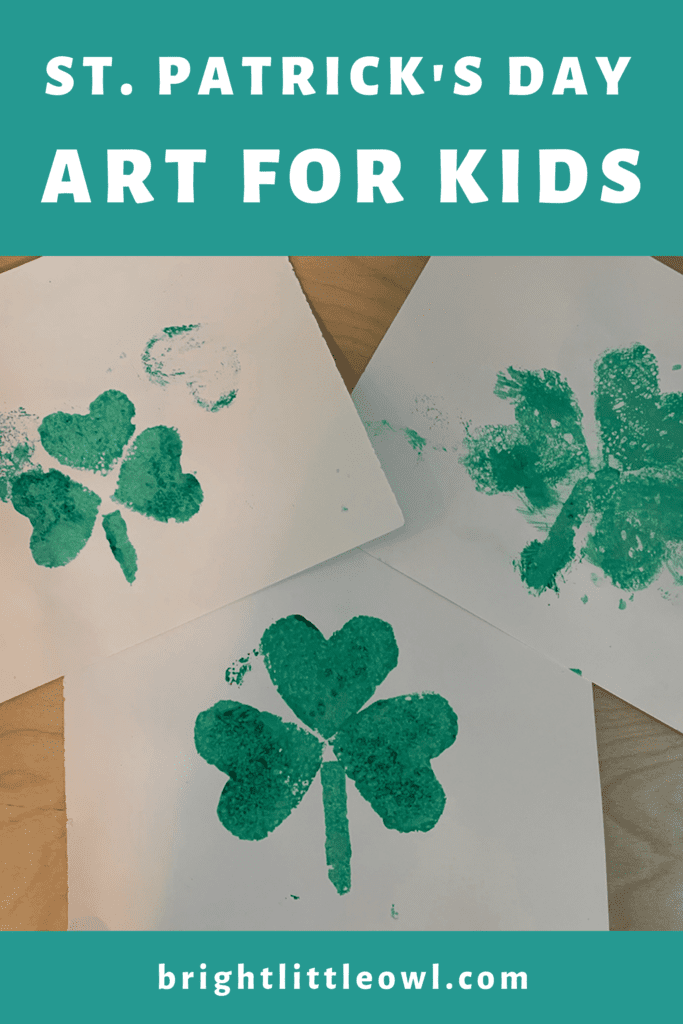
Are you still looking for a St. Patrick’s Day art project to do with your little one? Here is a shamrock sponge art activity for kids I used to present to the children in the Montessori 3-6 classroom every March.
You are designing a shamrock using a heart-shaped sponge, like a paint stamp. With this art activity, your child is also learning about:
- Culture: St. Patrick’s Day
- Nature study: a plant growing a stem, then blooms
- Order, patterning, sequencing
- Concentration and focus
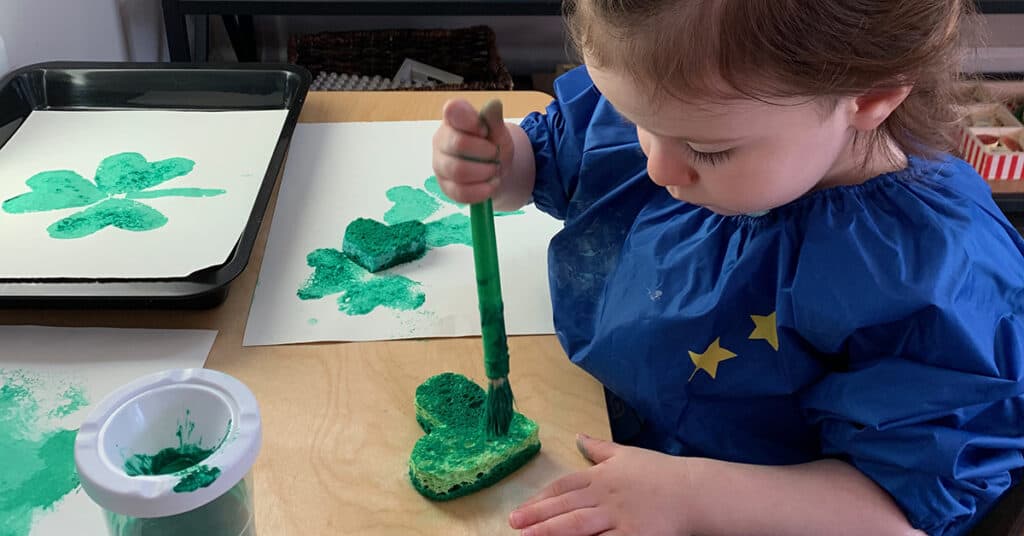
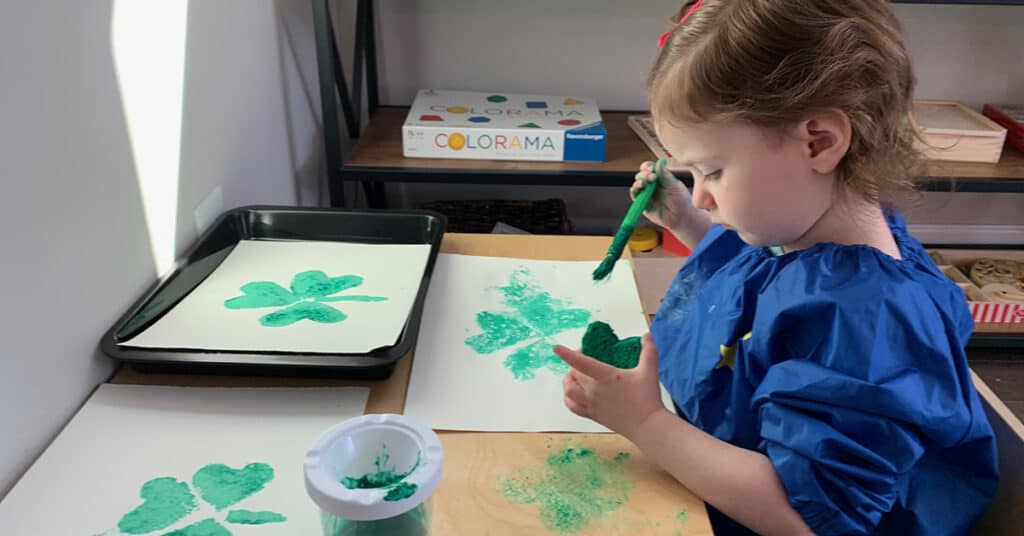
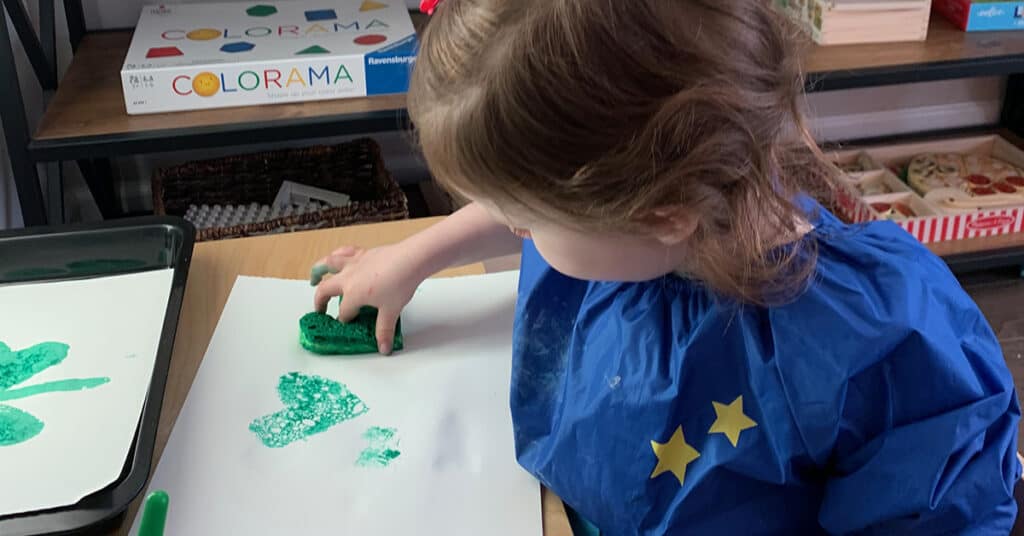
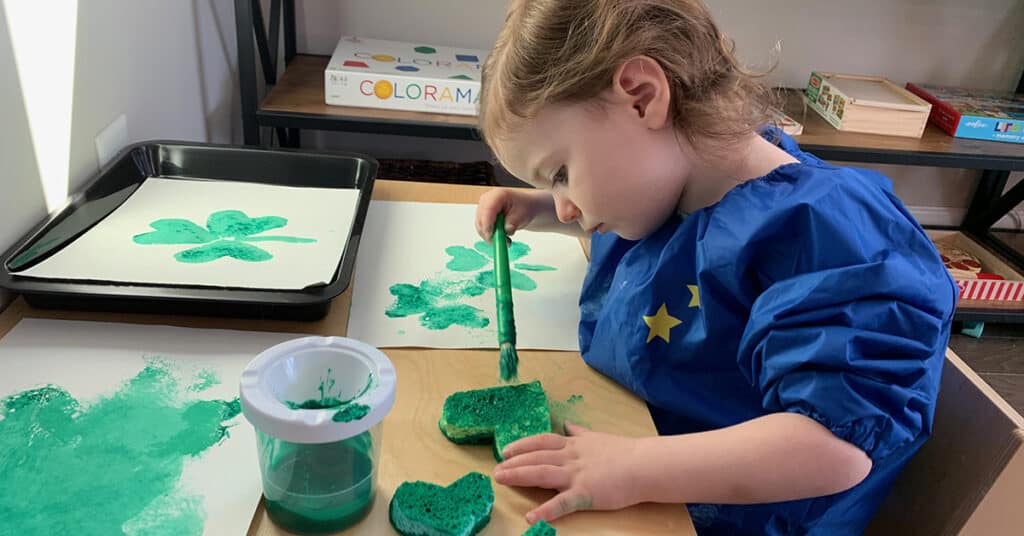
I tried this activity with my two-and-a-half-year-old. She loved exploring freely with the paint, the paintbrush, and the sponge. I found that her favorite thing to do is paint objects. She even painted the paint container lid!
This is totally okay. Young children are not trying to create the final end product, which is a shamrock. Children at this age are exploring. They are enjoying the moment and the process. Enjoy the process with them!
How to Pull Together the Shamrock Sponge Art Activity for Kids
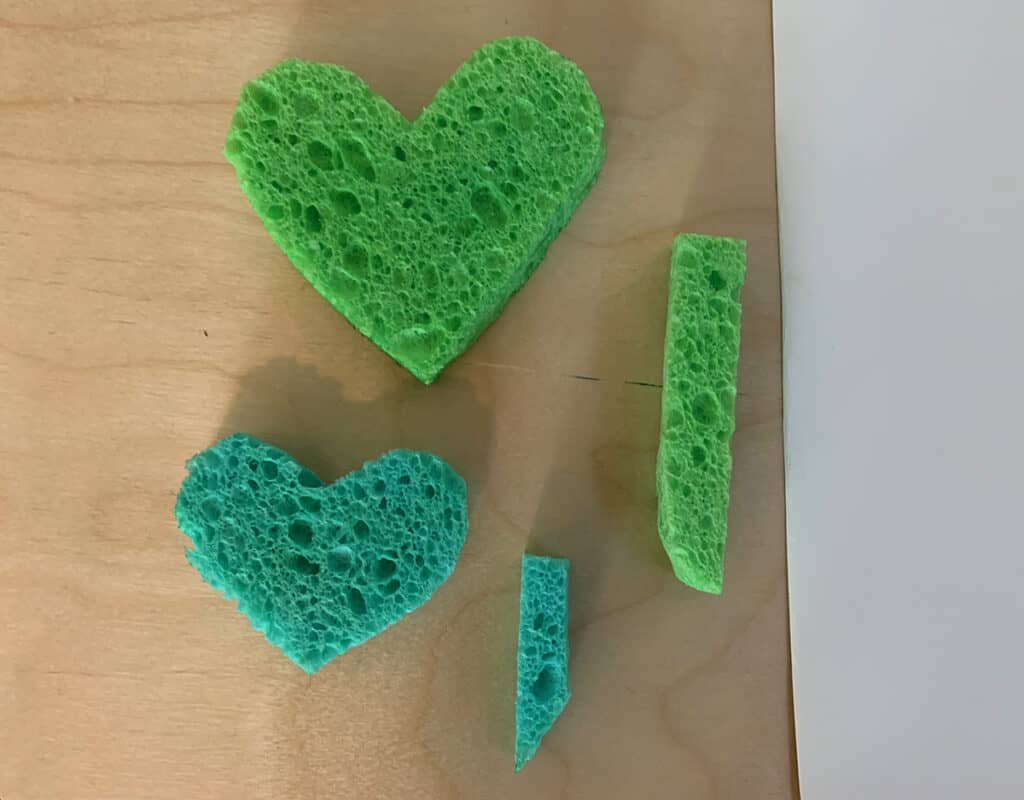
1. Cut heart shapes and stems out of sponges
Since this is a St. Patrick’s Day shamrock activity, I like to use green or teal sponges. I like to cut out a large heart and a small heart so that there are different options.
First, I create templates the old-school way. I fold a piece of paper in half and draw half a heart starting at the fold and cut it out with regular scissors. This way, you have a symmetrical heart.
I like to trace the heart template on the sponge with a green washable marker. Then I cut the heart out of the sponge. You could also free draw a heart with a marker on the sponge and cut it out. It’s up to you!
Also, don’t forget to cut out a long rectangle shape to use as the stem! I usually just eyeball this at the end with the sponge scraps after I finish cutting out the hearts.
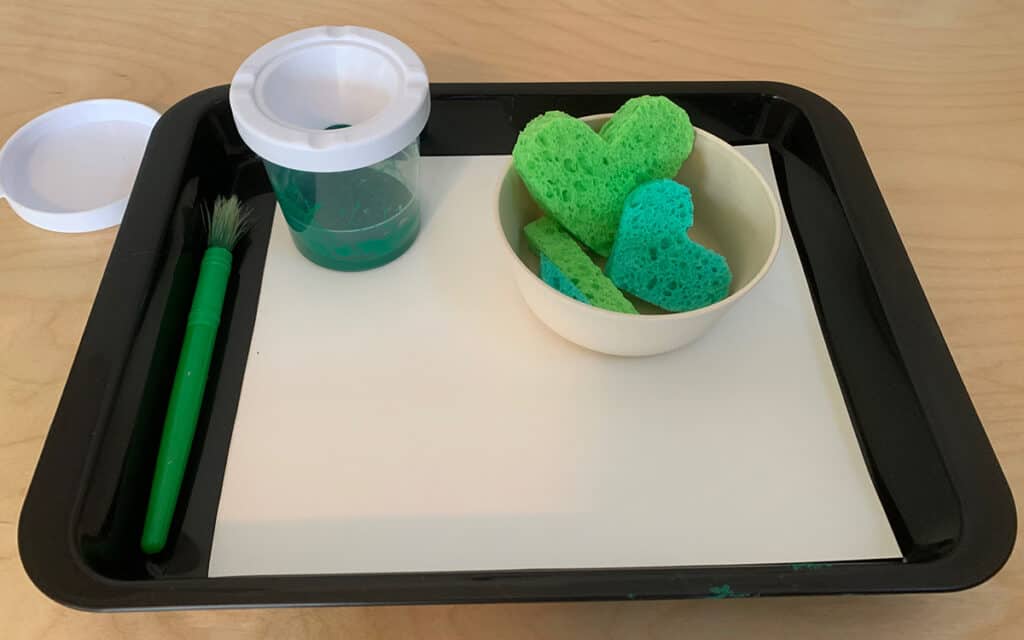
2. Pull together your Art Tray
In the Montessori classroom, the teachers prepare lessons and activities on a tray (or basket, container) and place them on the shelf for the children to choose and work on independently at the table. You can do this with this shamrock sponge art activity for kids at home.
Everything your child needs to complete the activity independently is on the tray. Your child chooses the activity, and if it is the first time she uses it, you show her how to do it first. Your child takes the tray and brings it to the table to work on it independently. She will most likely still need help, depending on age.
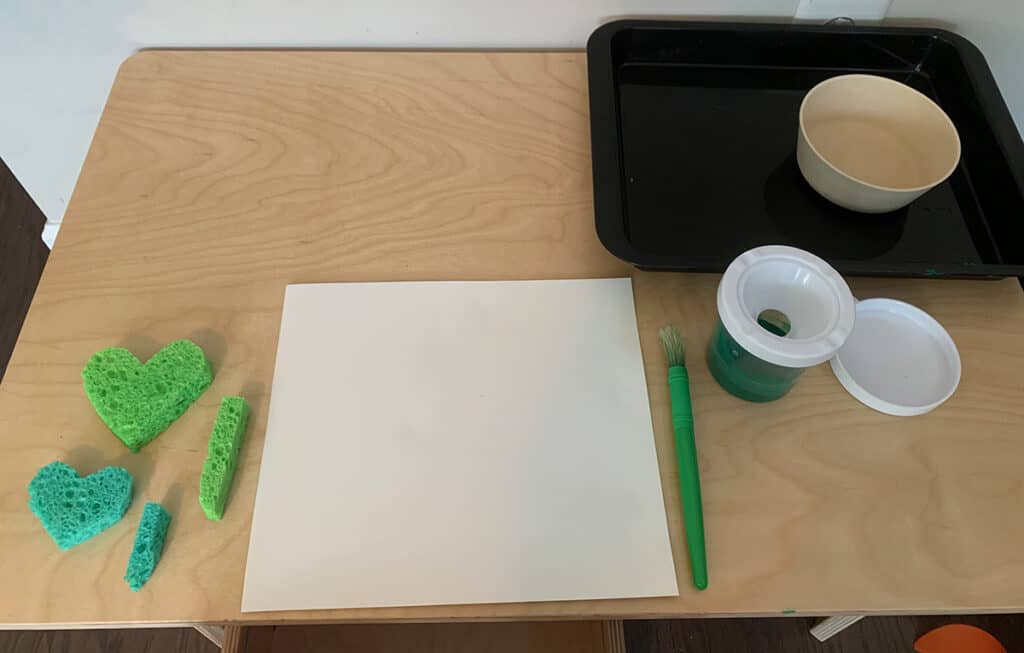
To pull together this independent tray, you will need:
- A large waterproof art tray to place all of the materials.
- Green Tempera paint, which is what I use with my two-and-a-half-year-old. In the classroom, I have tried using green Acrylic paint which comes out nice, especially if you want to stamp the shamrocks on something other than paper, like wood or rock. But keep in mind that Acrylic could stain certain surfaces and difficult to clean.
- Container for the paint
- Paintbrush(es)
- Container or bowl for the paint sponges
- The heart sponges and the stem sponges
- Painting Paper. We are using watercolor paper so that the paper doesn’t get wrinkly from the paint.
If you prefer to work together on the shamrock sponge art activity for kids, and you don’t want to place all of the materials on a tray for independent work, that is totally fine. Do what works best for you and your children.
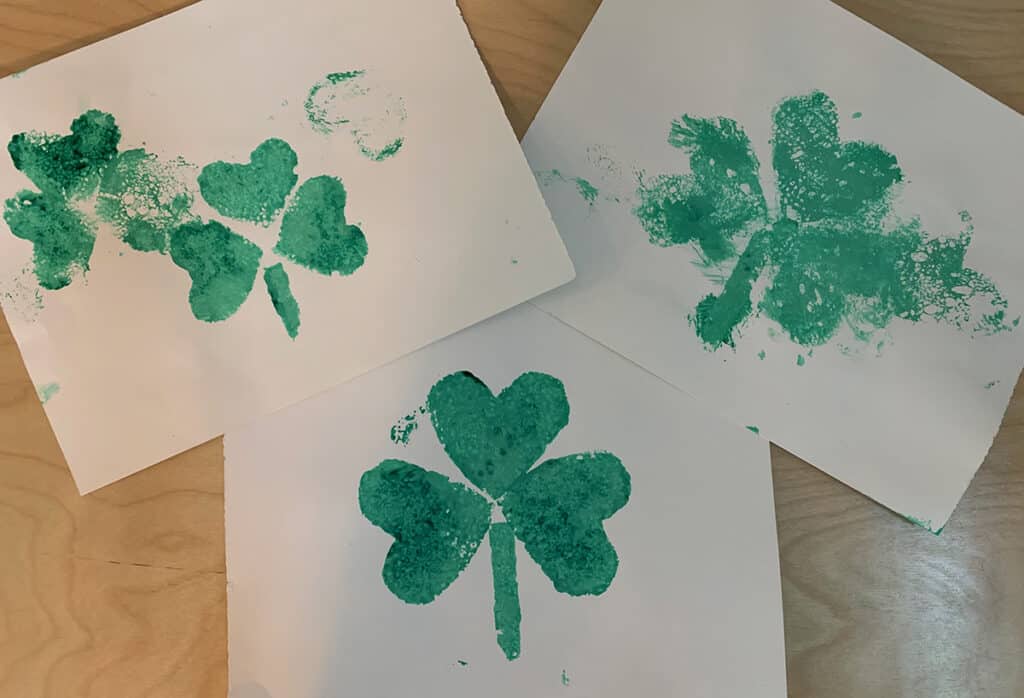
3. Make the Shamrocks
- Paint the heart sponge with green paint, covering the entire surface.
- Press down, like a stamp, the painted heart sponge in the top center of the paper.
- Paint the heart sponge again and turn the heart 90 degrees clockwise and press down, like a stamp, next to the first heart.
- Paint the heart sponge a third time and turn the heart counterclockwise and press down on the empty space, like a stamp to complete the shamrock
- Paint the stem sponge and press it down like a stamp, at the bottom of the shamrock
- There is your shamrock!
- You could also try stamping without adding more paint every time you stamp; you’ll get more of a faded look.
- Explore with the stamps and make your own cool design with them with different size shamrocks and different patterns.
Another Option:
One year I created a heart paint stamp out of green foam material to do this activity. This is a nice alternative to sponges. I created a stamp “handle” out of another piece of foam and glued it to the heart-shaped foam material.
Concluding Thoughts
This shamrock sponge art activity for kids is a lot of fun. It reminds me almost like putting together pieces of a puzzle. So if your child likes puzzles, she’ll most likely dig this activity.
I really like how practical life, science, sensorial, math, language, and culture is subtly integrated into this activity.
I came up with this idea when I was a Montessori teacher. One year, during Valentine’s Day season, we were exploring with paint heart sponge stamps with red, pink, purple, and white paint.
The idea to turn the hurts to create a shamrock design came to me while exploring with the kids. We tried the 3 Green Hearts to make a shamrock for St. Patrick’s Day that year, and it was a huge hit!
I will try this activity again next year with my daughter is three-and-a-half and update how it went, on this post. There are so many new things to discover at any age.
Did you try this activity with your kids? I’d love to hear how it went. Leave a comment below!
Cute! Perfect for toddlers and preschoolers.
This sounds like a fun activity! I will try it with my little one this weekend. Thanks for posting this!