Like the Montessori sand tray, your child can practice writing a letter on the chalkboard and erase the letter right away if she’d like! Writing on a chalk board is also a great hands-on sensory experience with its unique natural texture and feel.
I have observed that young children love to draw and write with chalk on the board. They love to explore with different colored chalk and they are drawn to erasing the board and starting all over again.
Writing with chalk is also excellent for preparation for handwriting with a pencil. The best part is that your child can easily erase her letters or words on the board, which can be less stressful than trying to write on paper. Also, breaking the chalk in half helps with the three-finger grasp.
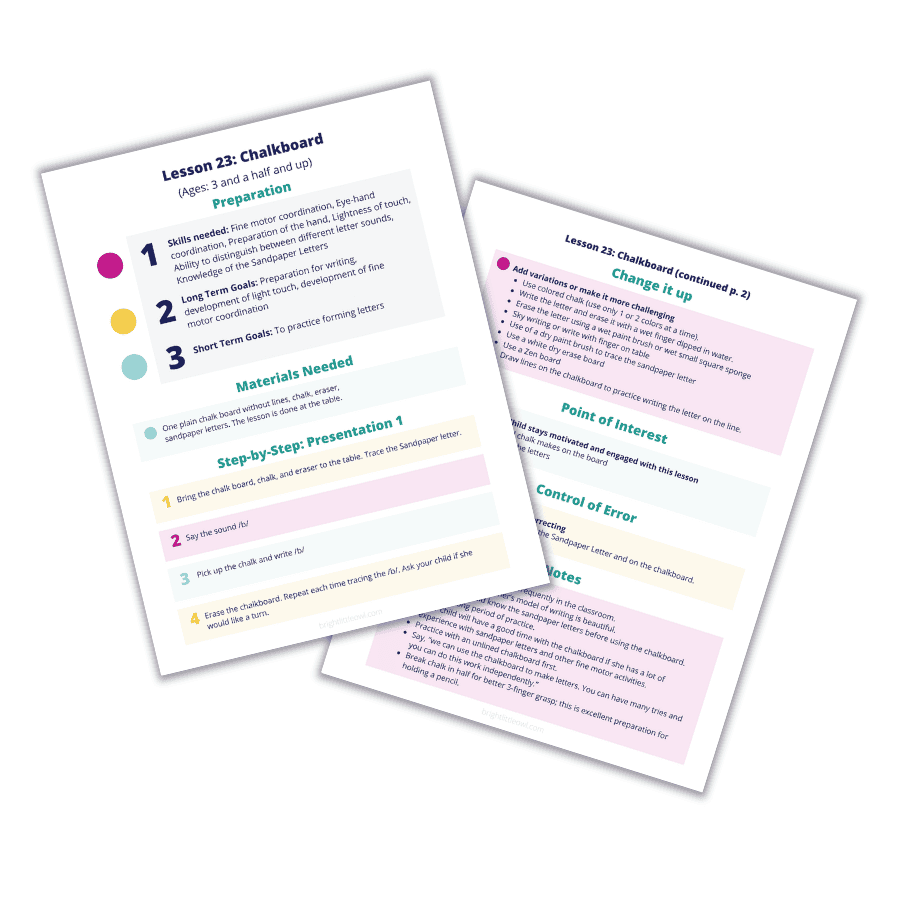
In this post, I’ll share with you the chalk board lesson I learned from my teacher training. I’ll also share 4 more chalk board ideas I’ve experimented with in the Montessori classroom, as well as with my five-year-old daughter, Annie, at home!
In This Post
Why is the chalkboard for handwriting important?
According to the Raising Children Australian article, Handwriting Skills for Children,
"Handwriting is a complex skill that develops over time. To learn handwriting, children need to combine fine motor skills, language, memory and concentration. They also need to practice and follow instructions... You can encourage your child to develop an interest in handwriting by giving them opportunities to draw, scribble and write. This prepares your child for the formal handwriting they’ll learn at school."
writing on a lined chalk board
We want to provide many opportunities for writing to our children. We, as the adults model beautiful handwriting. We also can give our children different writing tools in varying colors, textures, and mediums and explore with different types of paper, boards or other surfaces.
Using a chalk board for writing preparation is a wonderful tool. It is unique, encouraging, and exciting with a hands-on sensory experience.
Chalk is made of limestone rock, which has a powdery, soft, and brittle feel. Your child feels the natural chalk in her hand and how the texture glides on the board. Also, erasing the chalk off the board has a powdery feel of chalky residue.
Writing with chalk can also be less stressful than writing with a pencil on paper because you can erase the board right away and start over again.
Practicing writing with a chalk board helps young children:
prepare for writing
develop a lightness of touch
strengthen fine motor coordination
practice letter formation
writing the letter with chalk on a chalk board
How to do the Montessori chalkboard lesson
What you will need
A chalkboard
Start out with one plain chalk board without lines. I found a small 9″ x “12 table slate chalk board at the Michaels Arts and Crafts store.
I also found a similar chalk board on Amazon that had more of a synthetic finish, and it works just as well. I used this one to draw lines with a white paint pen. Both chalk boards are inexpensive at about $3 to $5 each.
Chalk and a chalk board eraser
A set of sandpaper letters
To read more about the sandpaper letters and download the sandpaper letter printable I made, go to my blog post:
Also, if you’d like to draw lines on your chalk board, you’ll need a white chalk paint pen that’s erasable with water and a ruler to draw a straight line.
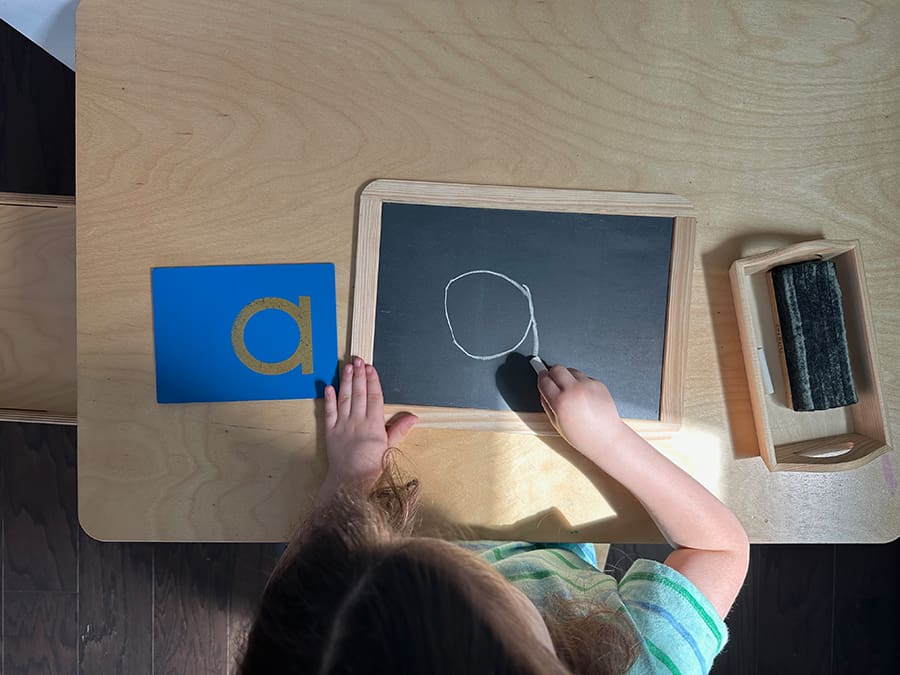
First, trace the sandpaper letter
Step-by-step: Chalk board lesson
When you first introduce your child to the chalk board, you, the adult, will model how to do the lesson, and you will model beautiful handwriting.
Then, you can encourage your child to work on writing letters with the chalk board independently.
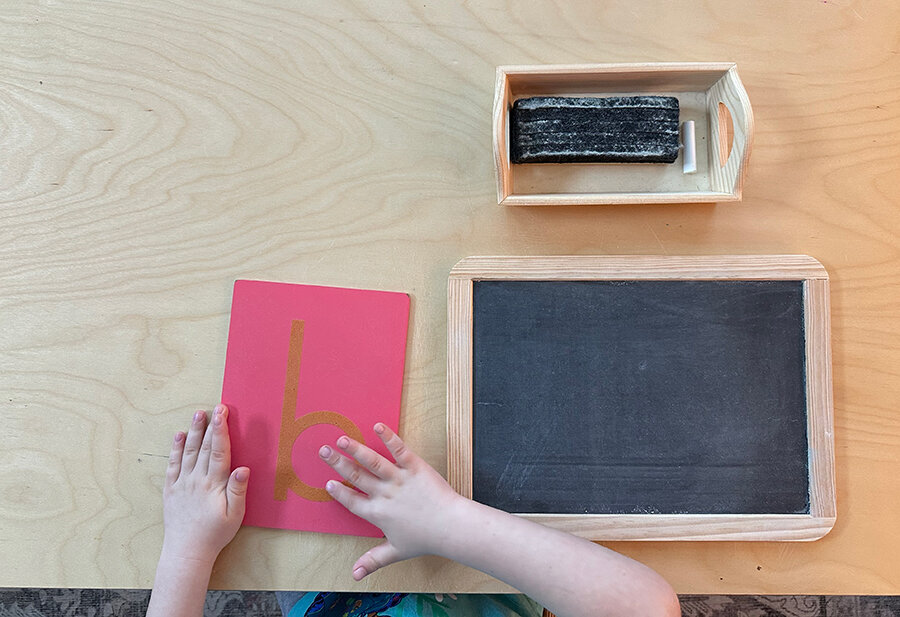
I like to set up a small tray with chalk and an eraser so it’s easier to bring to the table.
Tell your child, “We can use the chalk board to make letters. You can have many tries and do this work independently.”
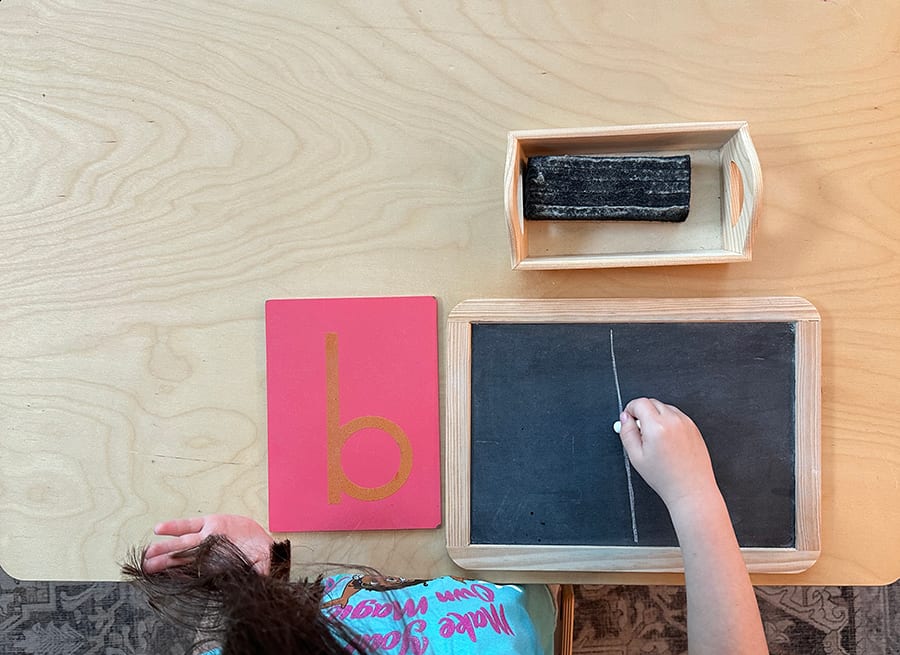
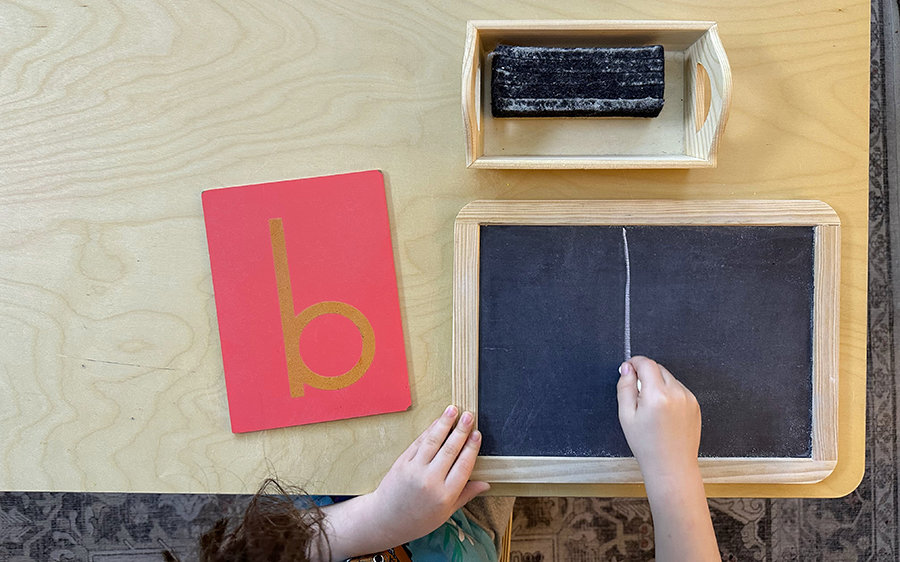
write the letter b with the chalk
Bring the chalk board and a tray with the chalk and eraser to the table.
Trace the sandpaper letter/b/.
Say the sound, /b/.
Pick up the chalk and write /b/.
Erase the chalk board. Repeat each time, tracing the /b/ first.
Ask your child if she would like a turn.
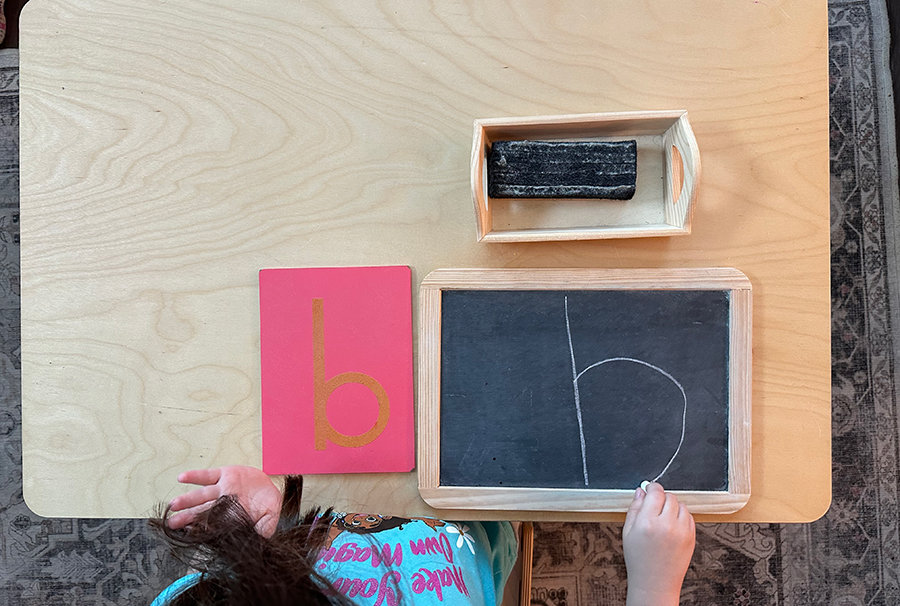
write the letter b with the chalk
Here are the 4 chalk board ideas
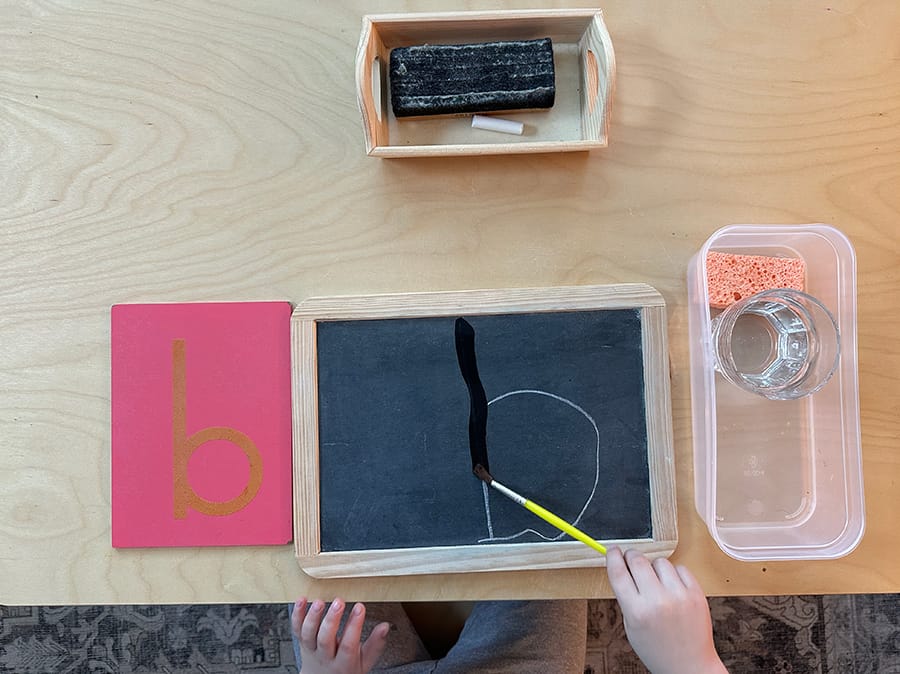
1. Use a wet paintbrush or wet sponge
Trace the b with a wet paintbrush
For this variation, you’ll need a plastic tray, cup of water, paintbrush, sponge (and scissors to cut the sponge), and towels nearby.
It is so much fun to trace over the letter you just wrote with a wet paintbrush! The bonus is that your child can trace the letter a second time by going over it again with the paintbrush.
There is something so intriguing and calming when using a wet paintbrush on the chalk board. It instantly erases the chalk like magic, but you can still see the letter remain wet on the board.
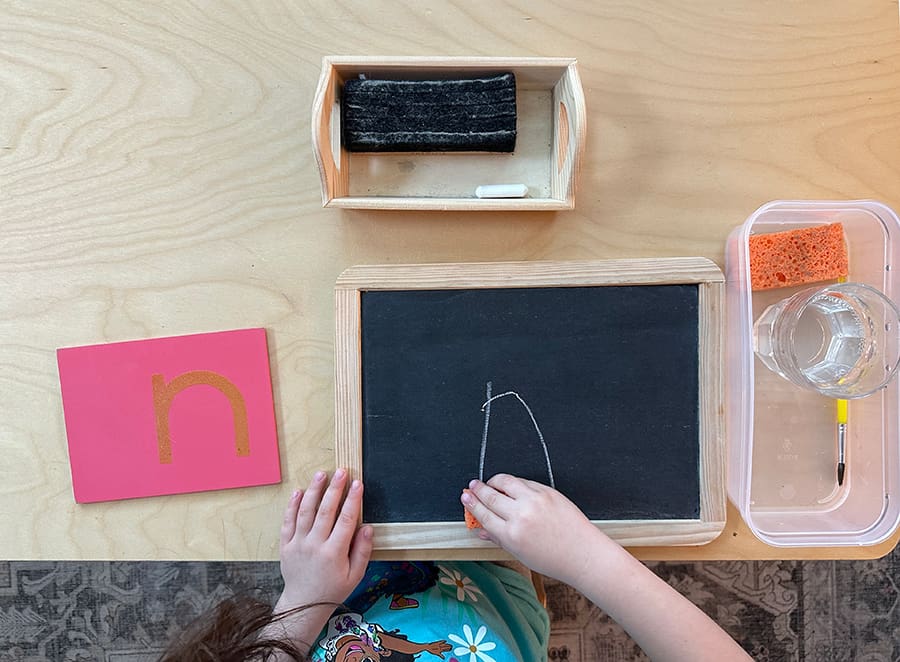
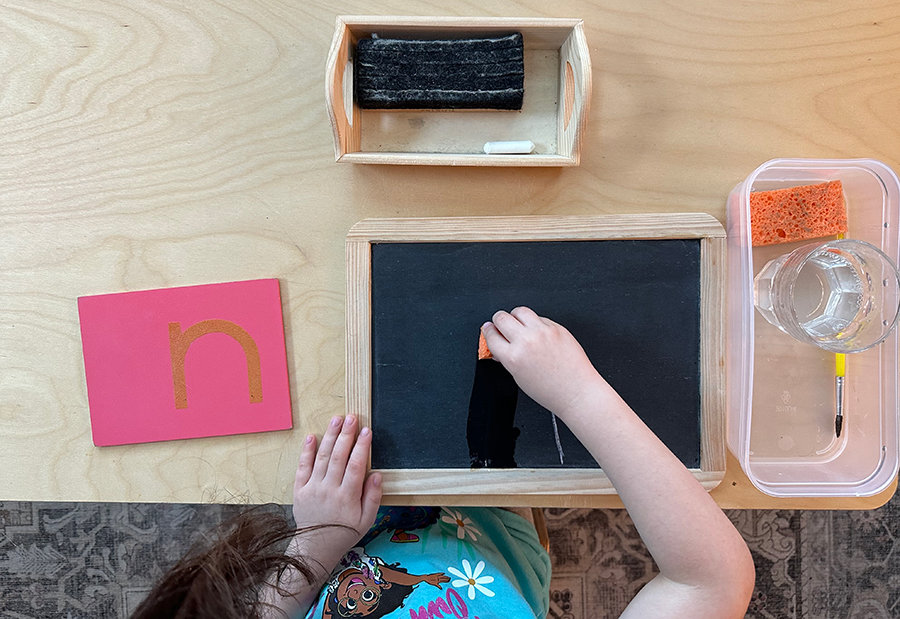
Use a wet sponge to erase the letter, while tracing
Another similar idea is to cut a sponge in small one-inch squares, dip it in water, squeeze out the excess water, and trace the wet sponge over the letter you just wrote in chalk. You get the same effect as the wet paintbrush, but it has a different feel, it’s thicker, and is more of a hands-on experience.
trace the n with the wet sponge
Tip: have a larger wet sponge nearby to clean the whole chalk board before moving on to the next letter. Let the chalk board completely dry between letters. Although, writing on a wet chalk board is a unique sensory experience!
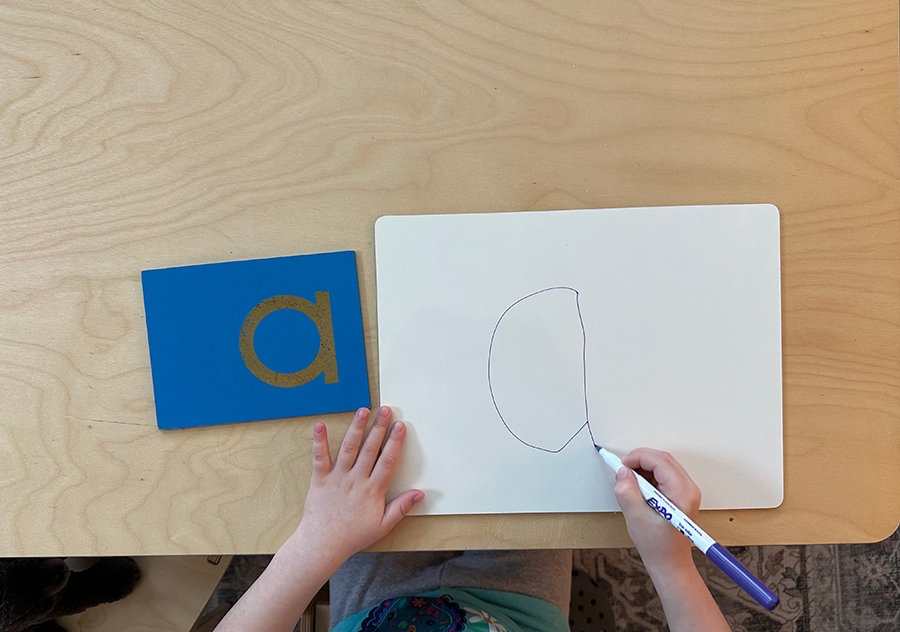
2. Use a dry erase board
first, trace the sandpaper letter
I feel that chalk is ideal for the hands-on experience of writing. For instance, you need to have a firmer pressure when writing with chalk on the chalkboard. Also, the feel of the chalk in the hands is more natural and earthy.
Dry erase is a different sensory experience. However, using a dry-erase board with dry-erase markers is a great alternative to chalk for handwriting practice. Just like the chalk board, you can immediately erase the dry erase board and start all over again.
Dry-erase markers are also perfect for kids who may not like to work with chalk for sensory reasons. Chalk is dusty and messy and can have a dry and gritty texture.
If using dry-erase markers, be sure to look for non-toxic and “low odor” versions. We used “low odor” Expo markers. There are several other brands with different colors and thicknesses.
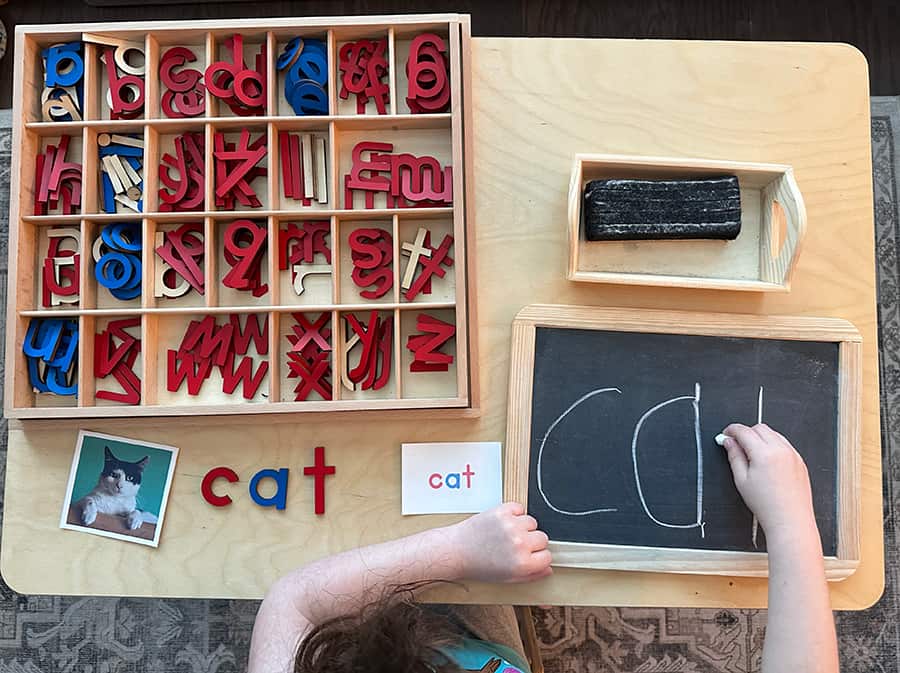
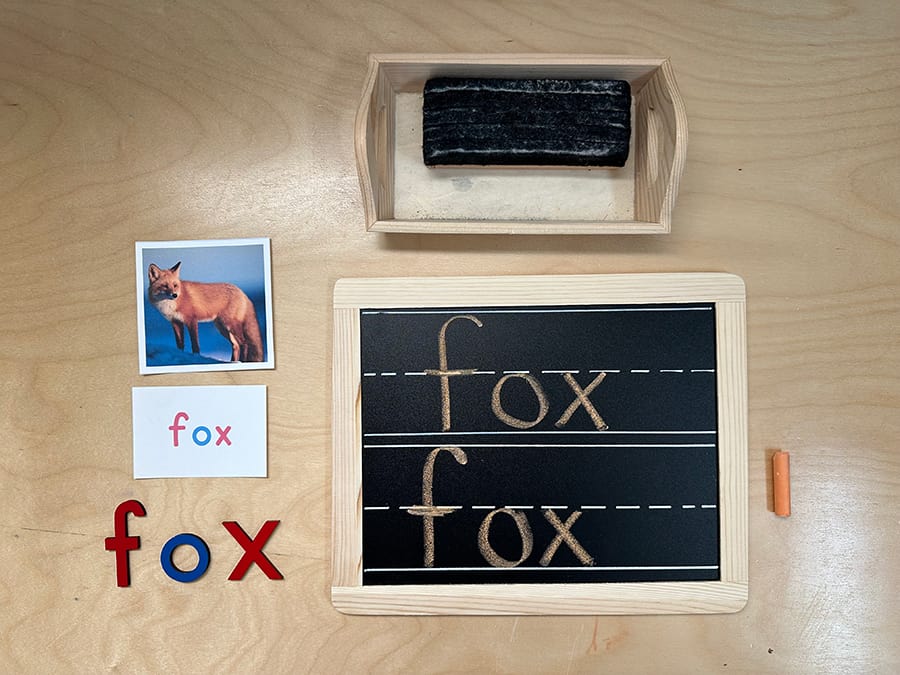
3. Use the chalk board with the moveable alphabet
write the word after using the moveable alphabet
If your child writes words with the moveable alphabet, she can also try to write the word on the chalkboard.
One of the extensions of writing words with the moveable alphabet is for the child to record her work on paper or in a journal after using the moveable alphabet. It is not required to write down the word, but it’s a fun extra activity if your child is interested.
If your child does not want to write the word with a pencil or is not ready to do this yet, don’t force her to do this. Sometimes, writing on paper with a pencil can be frustrating. But trying the chalk board can be less stressful because you can erase it quickly and start all over again.
When your child writes lists of word families, like cat, sat, mat, fat, rat, hat, and bat, she may also be ready for handwriting.
A fun alternative way to practice writing words if she’s not ready to write with a pencil on paper is to write words on a chalk board. You can also do this with a dry-erase board if your child prefers that!
For this activity, we used the word cards printables I made. If you’d like to download the word card printables and the moveable alphabet printable I made, you can sign up for the Resource Library at the bottom of this post.
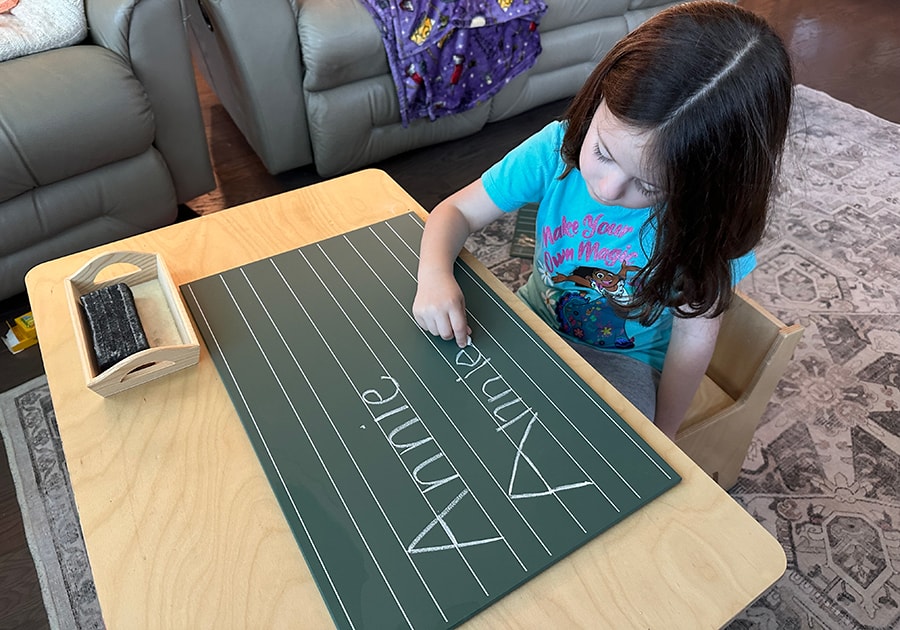
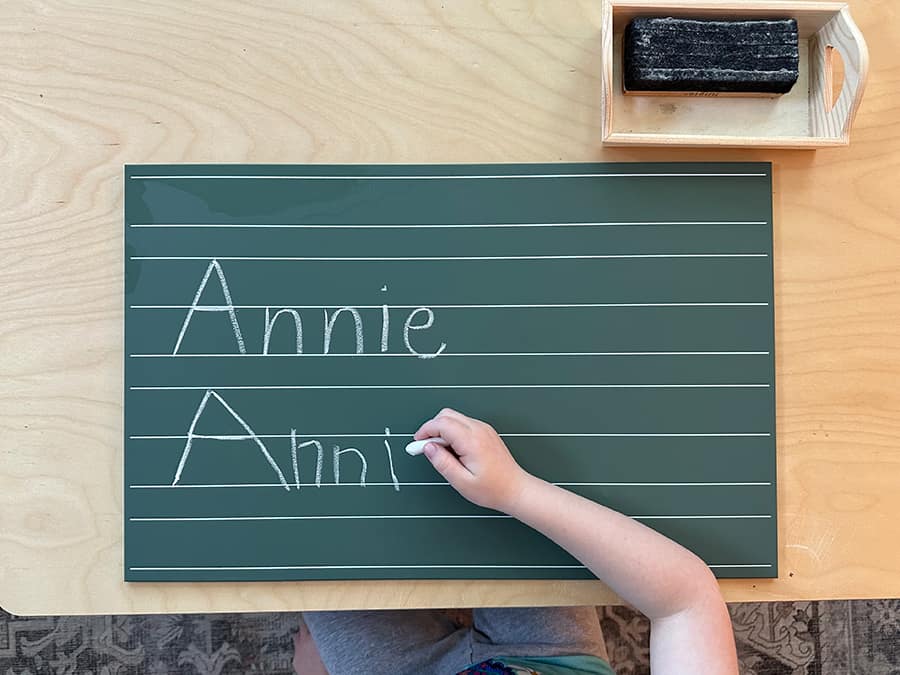
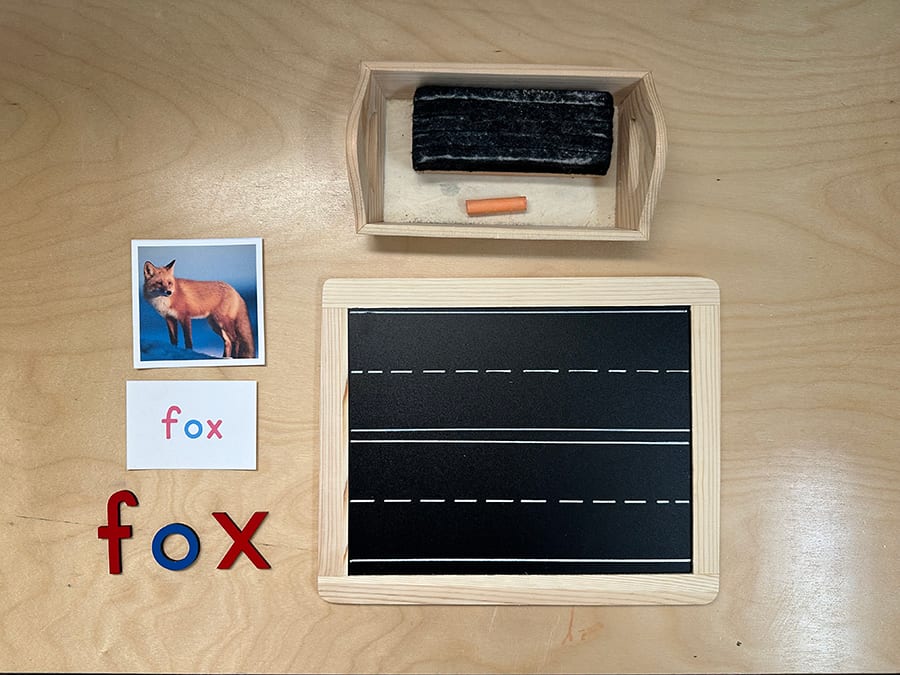
4. Practice writing on lines
practice writing on a lined chalk board
After your child had a lot of experience with writing letters on the unlined chalk board, your child can try to write letters and words on a lined chalkboard. I always like to start with writing our names. It is an excellent way to further handwriting practice before moving on to lined paper with a pencil.
There are official Montessori lined green chalk boards called green boards that you can purchase from Amazon or websites like Nienhuis or Alison’s Montessori.
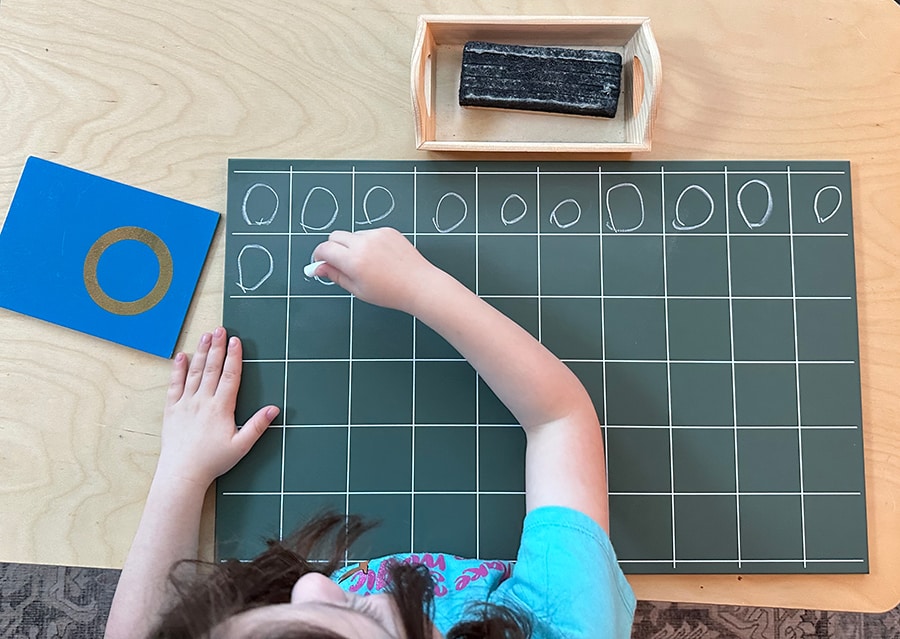
practice writing letters in squares for sizing
I like the square “grid” green boards so your child can practice writing letters with consistent sizing.
The lined green boards are expensive, so if you prefer, you can make your DIY lined chalk board. You can use a white chalk paint pen to draw your lines using a ruler on any blank chalk board you have at home.
draw your own lines with a chalk pen
The cool thing is you can write with regular chalk on the lines you made, and when you use a chalk eraser, the chalk pen stays on the board and doesn’t smudge. You only need water and a towel if you want to remove the lines. I tried this, and it worked well!
write the word on the lines
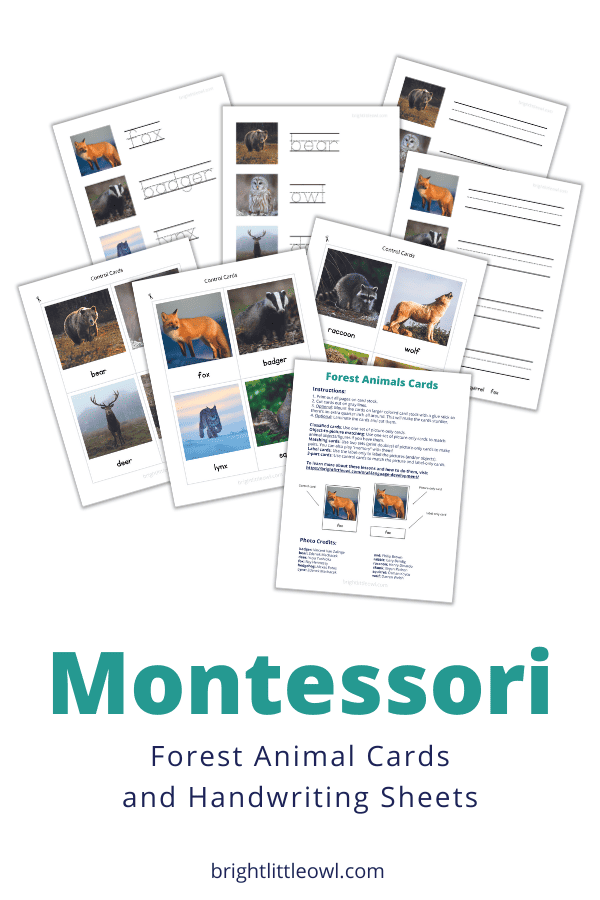
I also made a Forest Animals cards printable and a Forest Animals handwriting sheets printable. For the handwriting sheets, you can laminate them and use a dry-erase marker to practice handwriting and erase it with a cloth.
If you’d like to download the Forest Animals printable, sign up for the Resources Library at the bottom of this post.
More chalk writing ideas
Use colored chalk (use only 1 or 2 colors at a time).
Write the letter and erase it with a wet finger dipped in water.
Try “skywriting” with your finger in the air or write with your finger on the table.
Use a dry paintbrush to trace the sandpaper letter.
Write letters with a Zen board. It may take a while to dry before you can try again.
Concluding Thoughts about the chalk board lesson
Annie has enjoyed working with chalk on the board for a couple of years now. We also have a painting easel with a chalk board on one side, and she loves to draw pictures and write her name.
Her favorite chalk activity we tried has been erasing the chalk letter she just wrote with a wet paintbrush. She wanted to try this over and over again every time she wrote anything on the board. I think that it’s clever that you end up writing the letter twice using this method! It is also fun to watch the wet letter dry on the board.
The dry-erase board is a beautiful alternative to using chalk. I remember the dry-erase board was a big hit in the classroom, especially for the older kindergarten-age children practicing writing words and sentences. You can also use dry-erase boards with lines.
In my next blog post we’ll talk about more ways to practice letter placement on the lines with the Montessori handwriting rugs, as well as practicing writing on paper.
Have you tried writing activities on a chalk board with your child? Leave a comment below!
I do love chalkboards and dry erase boards. These are so much fun and such a wonderful tool to help assist learning. We had these for all of my kids and they were great. I’ll suggest the tracing with a wet paint brush to my sister in law for her son. He’d enjoy that.
This is such a great chalkboard lesson for handwriting ideas. It’s a great tool to get little ones creativity going. I always loved my chalkboard growing up.
Great tips on chalkboard ideas! Your article is a helpful guide for unleashing creativity. The easy erase suggestions make it so convenient. Keep up the fantastic work, and I look forward to more inspiring posts from you!
I truly like this chalkboard idea for handwriting. My 5-year-old son has a hard time with letters and writing, and I think such a board will be useful for us. Thank you for cool idea.
When I was a kid, a long time ago, I loved my chalkboard. I wrote all over it all the time, and used it to learn how to recognize and reproduce shapes.
Love this multi-modality technique for teaching handwriting with the montessori method. Using a chalkboard is a dying modality. When you employ more of the senses, as you do with a chalkboard, smell, feel, sight, you get a lasting response to learning. Well done with this article.


These are such smart ideas for a chalkboard! I also love how creative the Montessori way of teaching is. So smart!
Hhhhmmm….I am thinking it gives confidence to the young learners to write as best as they can, between those lines on the little board.
Awesome tips for us homeschooling mom! Thank you for putting this together.
this is a fun idea for homeschoolers especially. but I love the sensory put of this that makes it fun for kids and helps it to cement in their minds
I love how simple this concept is yet effective. Great fun and learning for little ones
I do love chalkboards and dry erase boards. These are so much fun and such a wonderful tool to help assist learning. We had these for all of my kids and they were great. I’ll suggest the tracing with a wet paint brush to my sister in law for her son. He’d enjoy that.
Hi Melanie,
Thank you! My daughter’s favorite part was using the wet paint brush on the chalkboard!
This is such a great chalkboard lesson for handwriting ideas. It’s a great tool to get little ones creativity going. I always loved my chalkboard growing up.
Great tips on chalkboard ideas! Your article is a helpful guide for unleashing creativity. The easy erase suggestions make it so convenient. Keep up the fantastic work, and I look forward to more inspiring posts from you!
Hi Monidipa,
Thank you for your kind words. I’m so glad you enjoyed the chalkboard article!
I truly like this chalkboard idea for handwriting. My 5-year-old son has a hard time with letters and writing, and I think such a board will be useful for us. Thank you for cool idea.
Hi Olga,
Your son will love it! In the Montessori classroom, if a child needs help with handwriting, the chalkboard is always our go-to for practice.
When I was a kid, a long time ago, I loved my chalkboard. I wrote all over it all the time, and used it to learn how to recognize and reproduce shapes.
Love this multi-modality technique for teaching handwriting with the montessori method. Using a chalkboard is a dying modality. When you employ more of the senses, as you do with a chalkboard, smell, feel, sight, you get a lasting response to learning. Well done with this article.
Hi Laura,
Thank you so much for your comment! I’m happy you loved reading about the Montessori chalkboard lesson.
these are some fantastic ideas. I’m a teacher and I’m always looking for fun and innovative ways to engage learners.
Such an awesome post! Love the Montessori approach.
I never thought about using the paintbrush and water with a chalkboard. That’s a great idea and a fun way to do something different.
ooh! I needed this post. I have a huge blackboard and always struggle with writing on it.
I absolutely love all of these ideas. I’ve always been a big fan of chalkboards for notes or play. They just have such a great old-school vibe.
These are great ideas! I think I might do something like this for a fun after-school list for the kids.